|
|
| |
|
| |
|
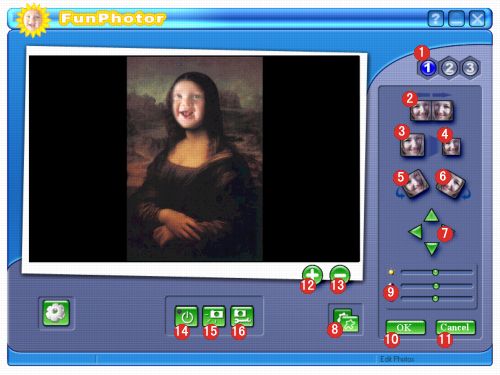
| 1. |
When a
template has only one mask, only the "1" button
will be available. When more than one mask appears in
a template, these buttons can be used select the active
photo to use the various placement and editing functions.
You can only move/edit one photo at a time. |
| |
|
| 2. |
This button flips the active photo horizontally.
|
| |
|
| 3. |
This button make the active photo
smaller. |
| |
|
| 4. |
This button make the active photo larger. |
| |
|
| 5. |
This button rotate the active photo counterclockwise. |
| |
|
| 6. |
This button rotate the active photo clockwise. |
| |
|
| 7. |
The four Move buttons move the active photo in the indicated
direction. |
| |
|
| 8. |
Click this button return to Edit
Mask Screen. |
| |
|
| 9. |
Adjusts the brightness/contrast/saturation of the selected
photo. |
| |
|
| 10. |
This button returns you to the Main Screen and adds
the currently selected template to the Main Display Area. |
| |
|
| 11. |
This button returns you to the Main Screen without making
any changes. |
| |
|
| 12. |
This button zooms in to the active photo to make small
adjustments. When zoomed, the Move tools work in smaller
increments, allowing photos to be placed more precisely. |
| |
|
| 13. |
This button zooms out on the active photo. |
| |
|
| 14. |
Click this button to toggle your live video camera on
or off. |
| |
|
| 15. |
Click this button to snap a photo from the video camera. |
| |
|
| 16. |
Click this button to select from available Video For
Windows drivers if you have more than one. |
| |
|