|
|
| |
|
| |
|
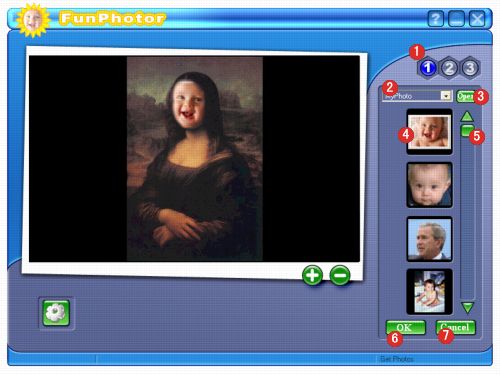
| 1. |
When a
template has only one mask area, only the "1"
button will be available. When more than one mask appears
in a template, these buttons can be used to select the
active photo. Click on the desired number, then select
a photo from an album to be inserted into the respective
masked area. |
| |
|
| 2. |
Use the down arrow to the right of the menu to change
among photo categories.
|
| |
|
| 3. |
This button opens the standard Windows
file dialog to add a new photo to the currently selected
Photo category. |
| |
|
| 4. |
Clicking the Get Template button in the Main Screen
takes you to the Get Template Screen. Here you can select
the template for your project and create your own templates.
|
| |
|
| 5. |
Use the up and down arrows to scroll among the available
templates in the current category. |
| |
|
| 6. |
This button returns you to the Main Screen and adds
the currently selected template to the Main Display Area. |
| |
|
| 7. |
This button returns you to the Main Screen without making
any changes. |
| |
|